Hello students,
For project 2 we will be working with “optical value” using 3 different techniques. You may choose to format each image within a 3 x 3 inch square on your paper using a vertical, horizontal, diagonal or staggered arrangement just as we did in the previous assignment. Each image should represent the same visual elements of shape, light, shadow, etc., however the techniques will vary.
When using optical value you must plan ahead, taking careful consideration of your full value range. Dark areas will be built up slowly with a series of marks, lines or dots depending on your technique. All of your pure whites will be a result of the paper with the absence of marks. One thing to consider is the values which fall between your darks and your lights which will act as mid-tone grays.
For this assignment I encourage you to search for reference images which display a large amount of dark and/or mid-tone values and a very limited amount of pure white. You can also sketch out and shade an image in pencil or charcoal first to help you decide upon the value structure that you’ll be using.
When you are ready to draw your final images, I would encourage you, once again, to start with pencil. Take your time drawing out each shape, including shadow shapes and light shapes, then fill in the areas of optical value with your Micron pens.
The techniques should be rendered in the following order:
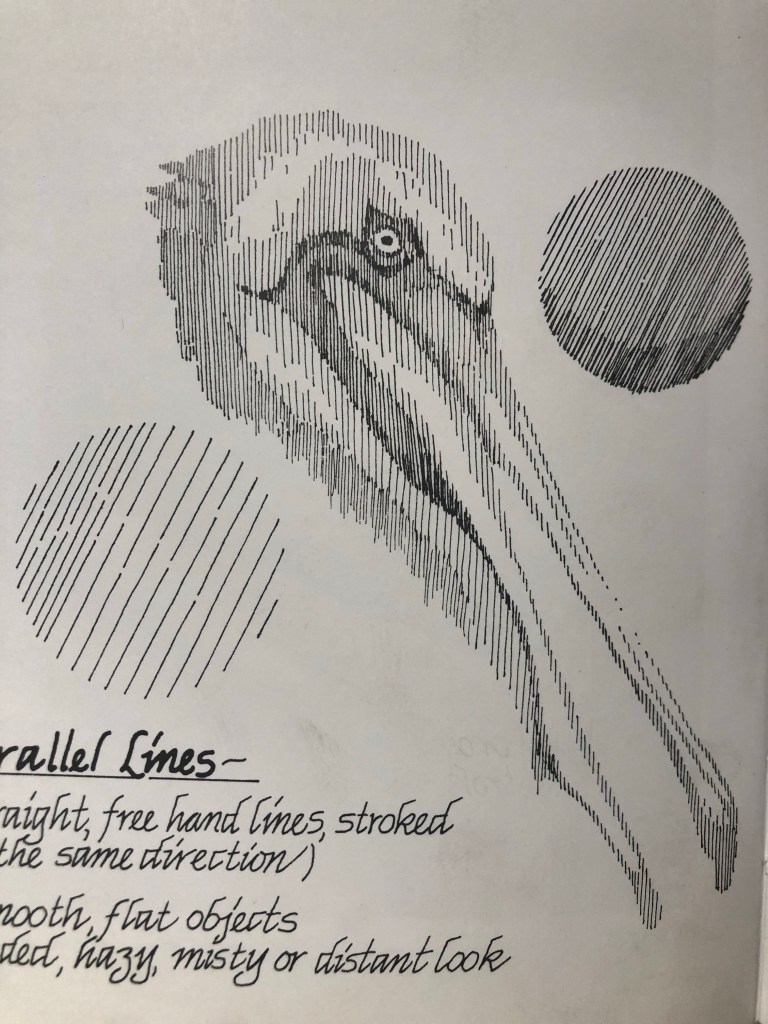
Parallel Lines
(All lines are moving parallel to one another. These can be drawn as vertical, horizontal or diagonal lines, however, once you choose a direction, you must stay with that direction! The lines cannot altar. Please see the example below.)
Cross Hatching
(Lines can move in opposite directions either diagonally, horizontally or vertically as seen in the examples below.)


Stippling
(This technique uses small dots in various arrangements as seen below.)


Good luck!
